Shopping
1. Account application
Glasscorp offers two types of account. The first option is the Glasscorp Trade Account. This account takes take full advantage of the services we offer, and you will be allocated with an Account Manager and website login where you can search products and place orders online. The second option is to sign up for an Online Only Cash Account. You will be given a login to the website where you can place orders and pay as you go. See below for details on how to sign up.
Step 1 - Click Login/Register
Click LOGIN/REGISTER on the top banner of the website.

Step 2 – Select the type of account
Select either Glasscorp Trade Account or Online Only Cash Account.
Step 3 – Fill out account details
Trade Account
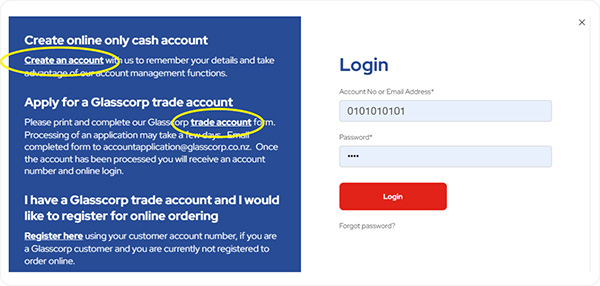
Print and complete the account form, and email it to: [email protected]
Trade Account processing can take a couple of days. Once complete, you will be sent an account activation email and an online login.
Online Only Cash Account
Fill out details online. Your account will be ready to use on completion.
• Back to top of the page •
2. Receiving a website login
Option 1 - Trade Account
After your Trade Account has been activated, you will be emailed a temporary login. Once logged in, you can change the password. Only one login is available per account, however this login can be used by multiple users at one time.
Option 2 - Online Only Cash Account
You will receive a login at the completion of the online application.
Option 3 - Already have a Trade Account but not set up online
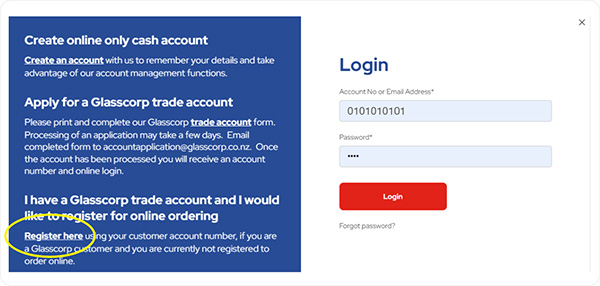
Use the link in the login page to register for online ordering. You will be emailed a temporary Login. Once logged in, you can change the password. Note: only one login is available per account. This login can be used by multiple users at one time.
• Back to top of the page •
3. Logging in/Forgot password?
Logging in
Step 1 – Click Login/Register
Click 'LOGIN/REGISTER' on the top banner of the website.

Step 2 – Enter login details
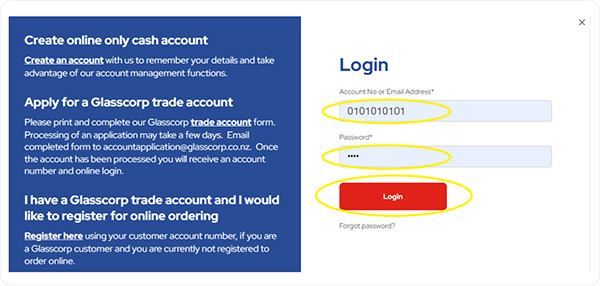
Enter your Glasscorp account number (or email address for Online Only Cash Customers) in the top field. Enter password in the bottom field and click 'Login'. You are successfully logged in when the 'Login/Register' icon changes to 'Account'.
Forgot your password?
Step 1 – Click Login/Register
Go to the Login/Register page located at the top of the webpage.

Step 2 – Click 'Forgot password'
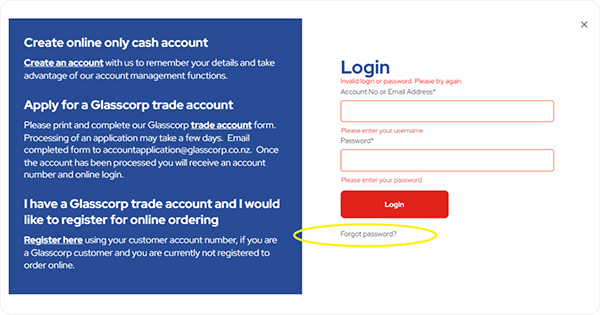
Click 'Forgot password?' in the Login/Register area. Enter the email address used for online ordering through the Glasscorp website. Follow the instructions sent to this email address.
Step 3 – Reset password
Reset your password.

• Back to top of the page •
4. Searching for products
Option 1 - Using the search bar
To use the search bar, type in the name of the product or product code. The search bar has a predictive function that will show options based on the text in the search bar. You can select one of these results which will take you to the product page for that item.
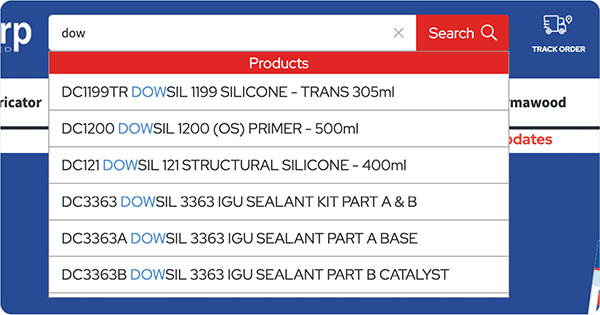
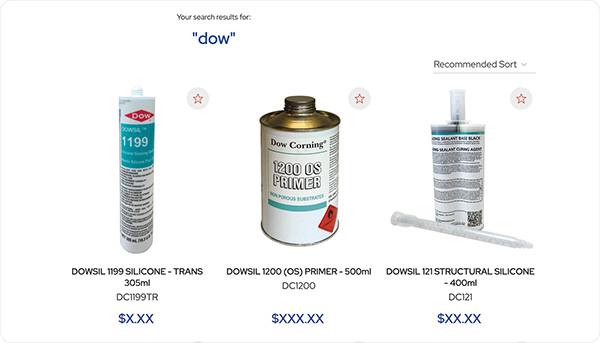
Alternatively, you can type in what you’re looking for and click search. You will then be taken to the 'Search Results' page. From here you can select from the products found in the search.
Option 2 - Using the drop-down menu
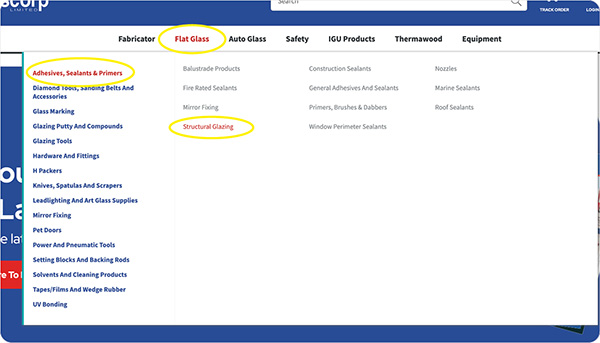
To navigate Glasscorp’s entire range of products, use the drop-down menu. The menu is divided into 7 main categories, with various subcategories branching off to further refine your search. Use the mouse to hover over the categories before clicking on the one you want. You can click on an entire category to select all products within or choose a sub subcategory for a more refined search.
Once you have selected a category, you will be taken to the category pages.
Option 3 - Navigating the category pages
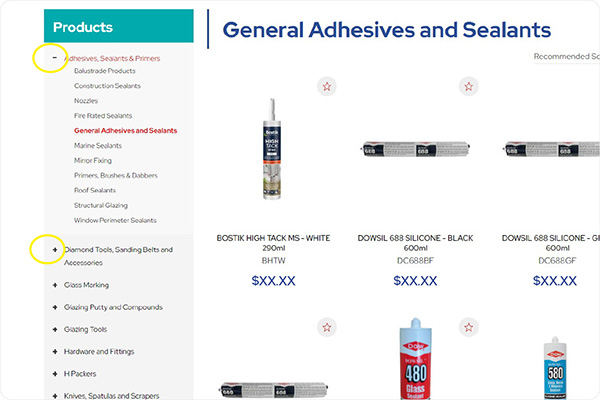
Use the left-hand menu to select between different sub-categories. Use the + and – symbols to open and close the menus.
• Back to top of the page •
5. Making an order
Step 1 - Adding products to the cart
To make an order, you first need to add products to the cart. This can be done in several ways:
a. Adding product from the Category pages
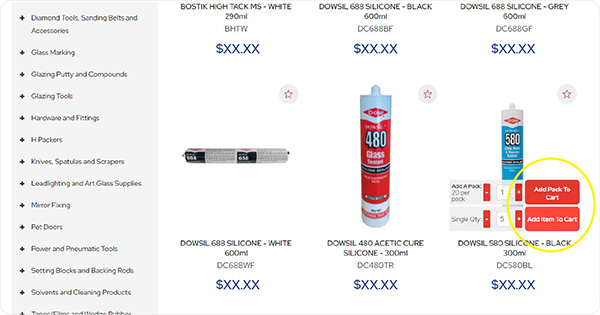
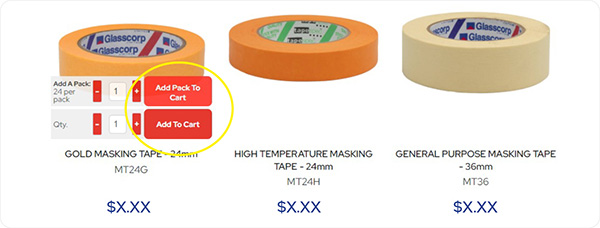
Hover the mouse over the product, add the quantity required and click on 'Add Item To Cart'. Most products have an option to either add individual items or packs.
b. Adding product from the Search Result page
Hover the mouse over the product, add quantity required and click on 'Add To Cart'. Most products have an option to either add individual items or packs.
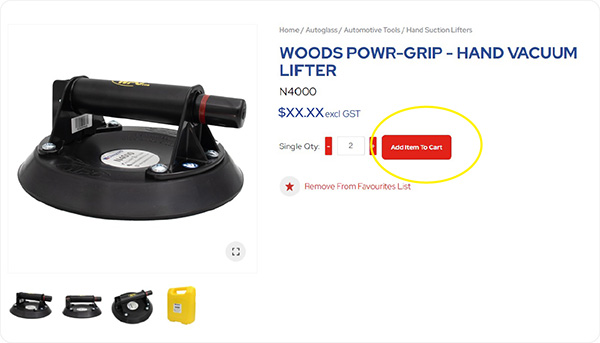
c. Adding product from the Product page
Add quantity required and click on 'Add Item To Cart'. Most products have an option to either add individual items or packs.
d. Adding a product from the Related Products
Related products are found at the bottom of a product page. Hover the mouse over the product, add quantity required, and click on 'Add Item To Cart'. Most products have an option to either add individual items or packs.

Step 2 - Reviewing the cart
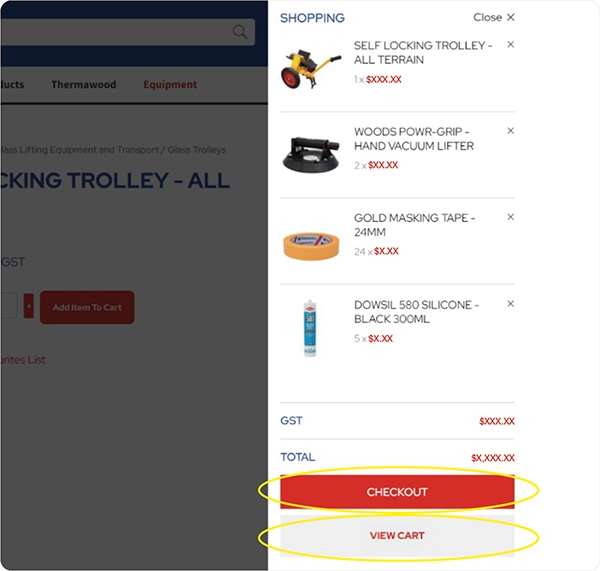
The cart can be viewed by clicking on the 'Shopping Cart' icon.
![]()
Items can be removed from the cart if not required. From here you can either 'View Cart' to make changes to the Shopping Cart, or head to the 'Checkout'.
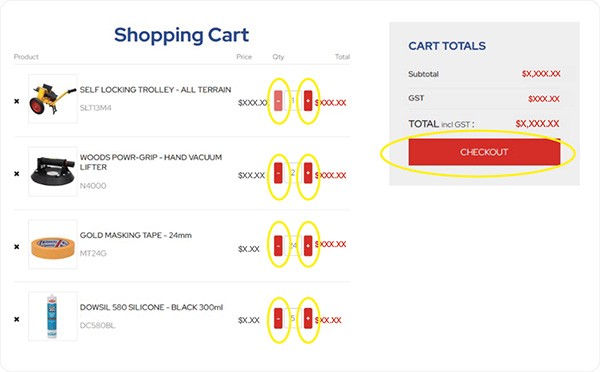
When on the Shopping Cart page, you can click on the + or – symbols to change quantities. Once you are happy with the Shopping Cart, click on the checkout button.
Step 3 - The checkout page
Check you have the correct email address in the 'Order Confirmation Email' field. This will be the email the order confirmation is sent to.

You can change this email address for a one-off order, or you can change the email address permanently by selecting 'Save email address to your account permanently'.

Next, select 'Pickup' or 'Delivery'.

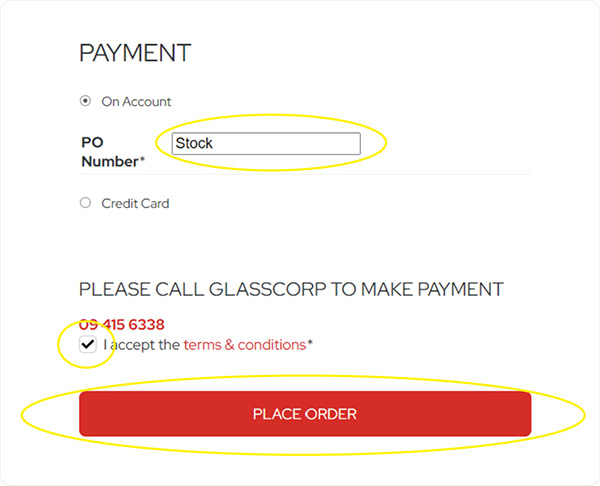
If your items are being delivered, check the delivery address details are correct. Then select payment option. If putting the order 'On Account', enter a purchase order number for your reference. Check the 'I accept the terms & conditions' check box and click the 'PLACE ORDER' button.
Step 4 - Order confirmation
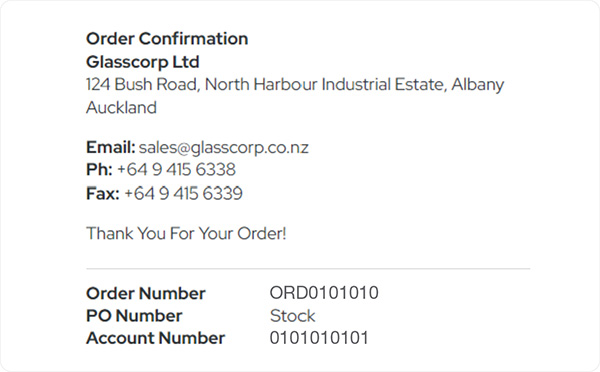
If the order has been received by Glasscorp, you will see the 'Order Confirmation' page.
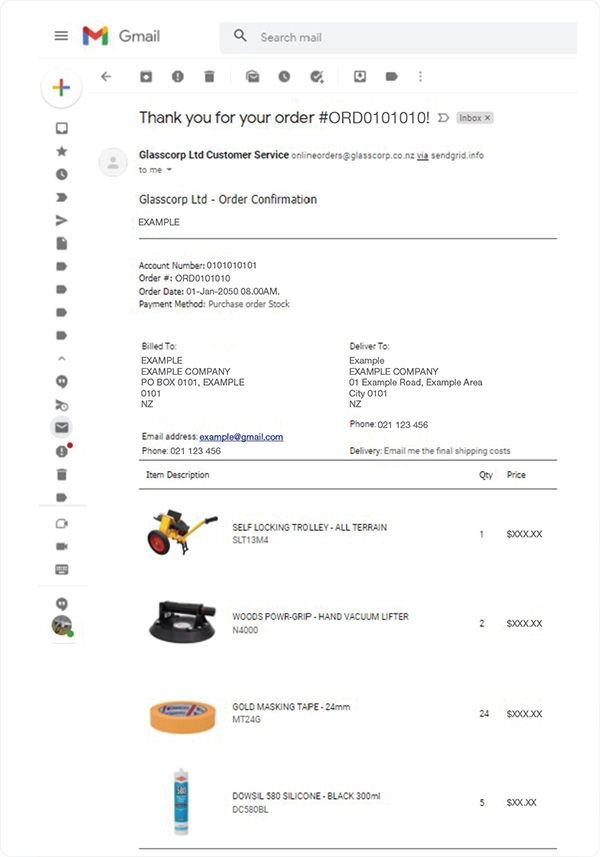
You will also receive an order confirmation email.
• Back to top of the page •
6. Using favourites list
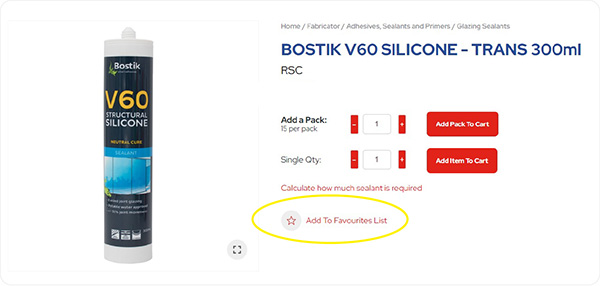
The 'Favourites List' makes ordering simple and fast. To add items to your favourites list, click the star symbol on the product page or hover over the item in the category section and click the star symbol.
Adding products from the Product page.
Adding products from the Category page.
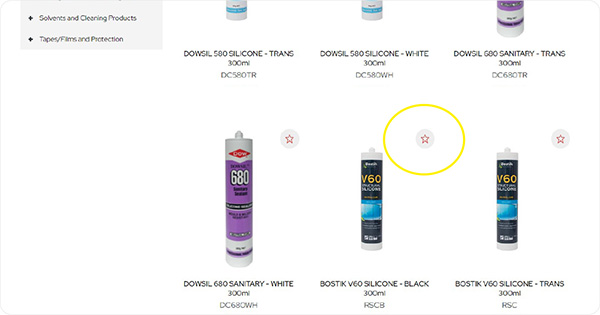
To access the favourites page, click on the 'Favourites' icon located in the top banner of the website.
![]()
From the Favourites page, you can add multiple items to the cart and checkout all in one go. Simply add the quantities required in the right-hand column before selecting 'Add Items To Cart' at the bottom of the list.
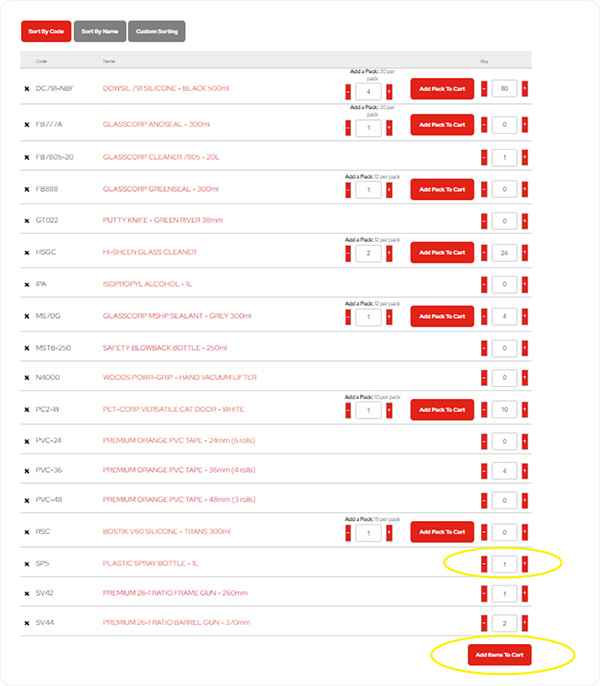
The Favourites page can be sorted by Code, Name or Custom. Custom allows you to drag items and order the products how you like.

Items can be removed from Favourites by selecting the X icon next to the products.
![]()
• Back to top of the page •
7. Tracking my order
Orders that are placed online can be tracked via the 'Order Tracking' page.
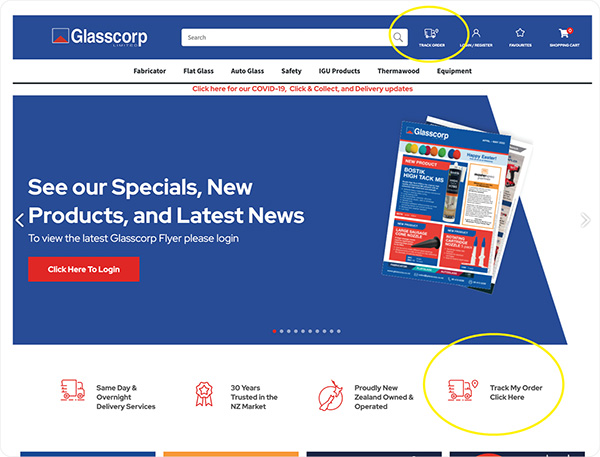
Step 1 – Go to the Order Tracking page
The Order Tracking page can be found at the top of any webpage or below the banner on the homepage.
Step 2 – Click on 'Ticket'
Once the order is picked and sent out for delivery, the tracking details will be visible in the Order Tracking page. Find the order you want to track and click the 'Ticket' link.
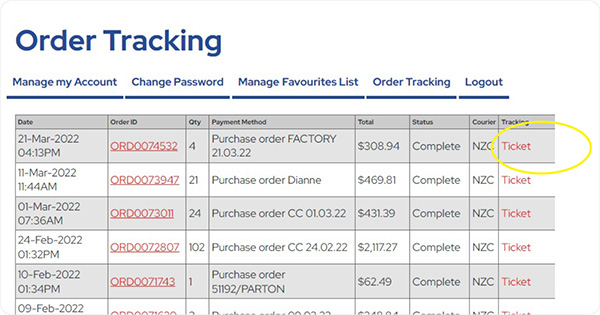
Step 3 – Check tracking information
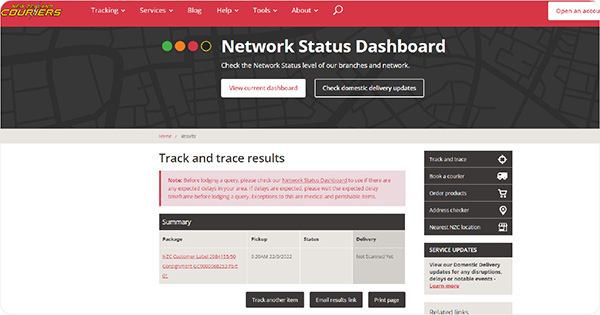
You will be directed to the Track and Trace results on the courier’s website.
8. Product data sheets
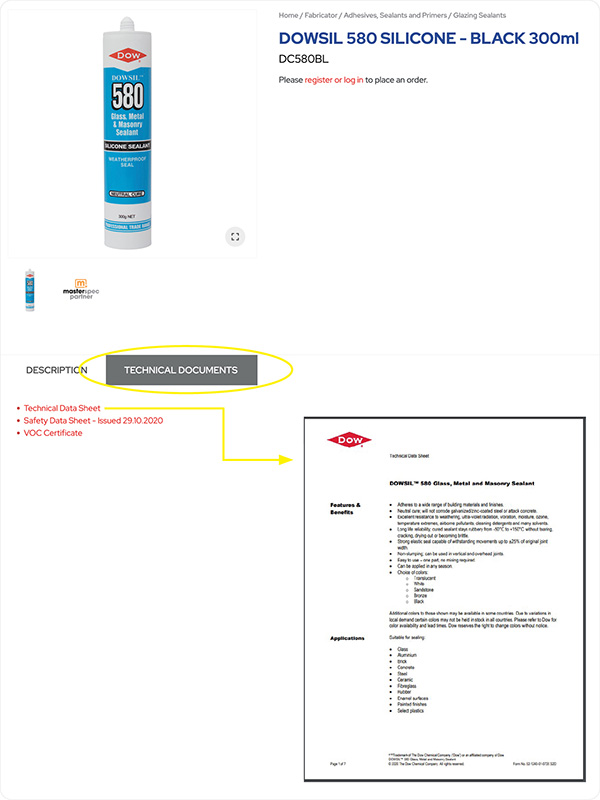
Product data sheets such as the Technical Data Sheet (TDS) and the Safety Data Sheet (SDS) can be found in the Technical Documents tab on the product page of an item. They can also be found in the search bar.
Option 1 – The product page
Select from the list of data sheets to view as a PDF.
Option 2 – The search bar
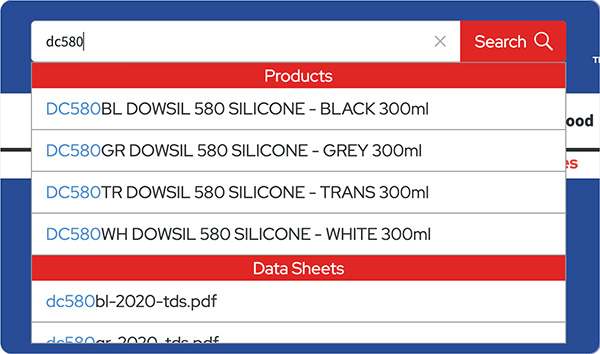
Search using the product code. Start typing until you see the drop-down box appear. Scroll down and select the data sheet required.
9. Calculating how much sealant I need
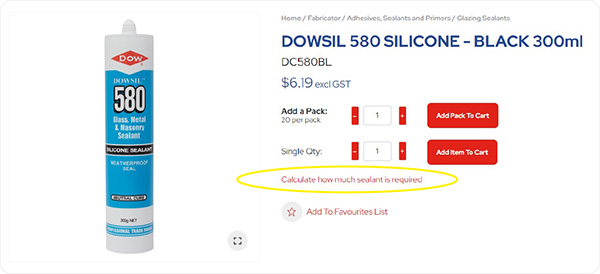
If you need to calculate how much sealant is required for a project, use the sealant calculator provided on the product page of the sealant you want to use.
Step 1 – Go to the product page
On the product page click on 'Calculate how much sealant is required'.
Step 2 – Joint dimensions
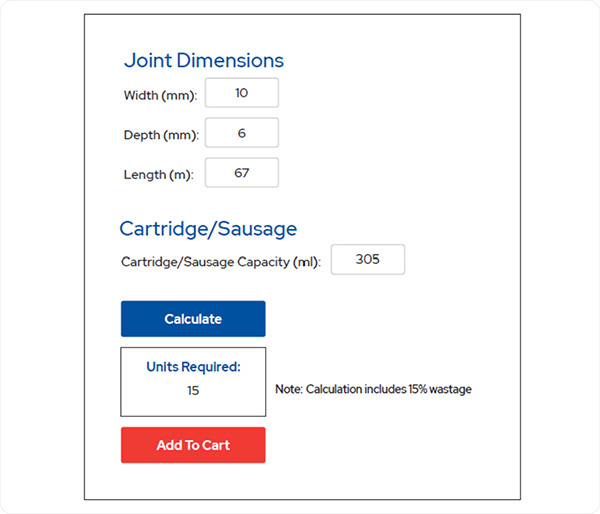
Enter the dimensions of the joint you want to fill and select 'Calculate'. You can then add the required amount of sealant to the cart.
• Back to top of the page •
10. Specials, new products, and latest news
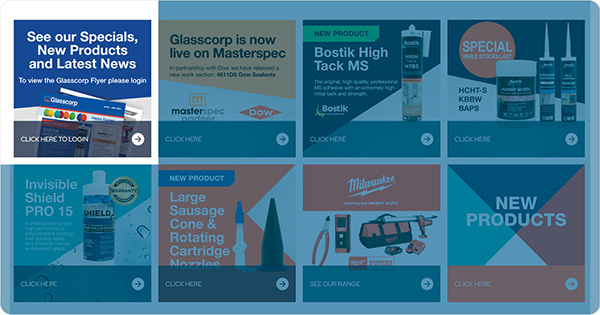
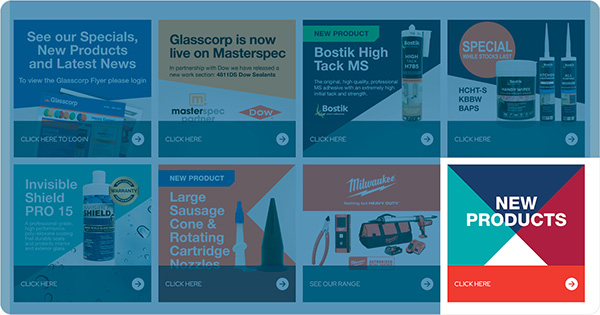
To view specials, new products, and latest news flyer, you must be logged in. You can now access the latest flyer from the homepage tiles. Latest products and News & Events can be found either in the flyer or on the homepage.
Specials, new products, and latest news flyer
The flyer can be found by clicking on the 'Flyer' homepage tile.
New Products
The latest products can be found by clicking on the 'New Products' tile on the homepage.
News & Events
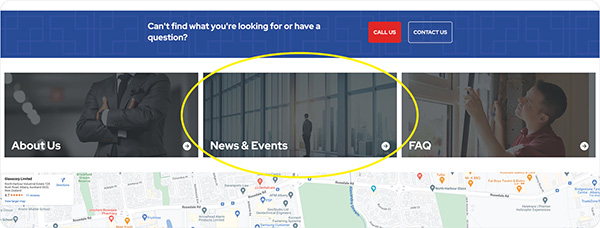
News and events can be found by clicking on the 'New & Events' block on the homepage.
11. Updating your details
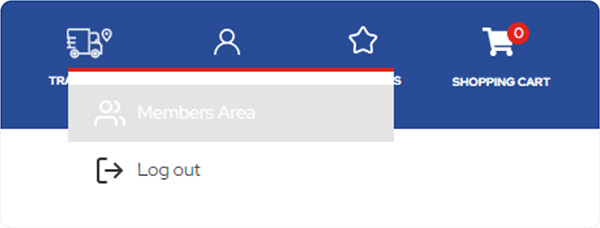
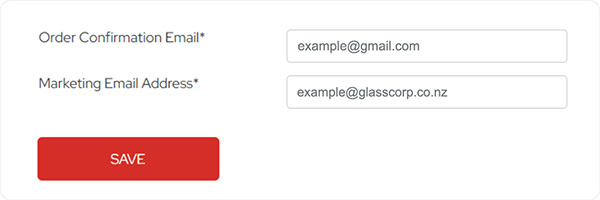
If you need to update your details such as your marketing email address (used for promotional material such as the flyer), you can do this in the 'Members' area of the website.
Step 1 – Go to the Members page
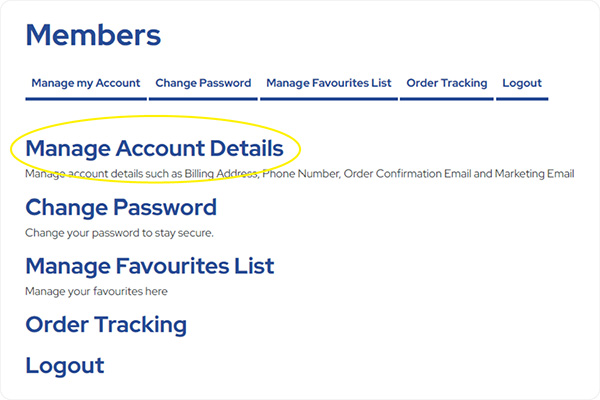
Step 2 - Select 'Manage Account Details'
Step 3 - Edit the fields as required and click 'SAVE'
• Back to top of the page •
